Changing the ink cartridges in your Canon printer is essential to maintain high-quality printing. Follow these steps to replace your cartridges safely and efficiently.
Step 1: Prepare Your Printer
Turn on your Canon printer and open the printer cover or access panel to reveal the ink cartridges. Some models may require you to press a button or select an option from the printer menu to access the cartridge compartment.
Step 2: Wait for the Cartridges to Move
After opening the compartment, wait for the cartridges to move to the center of the printer. This positioning allows easy removal and installation.
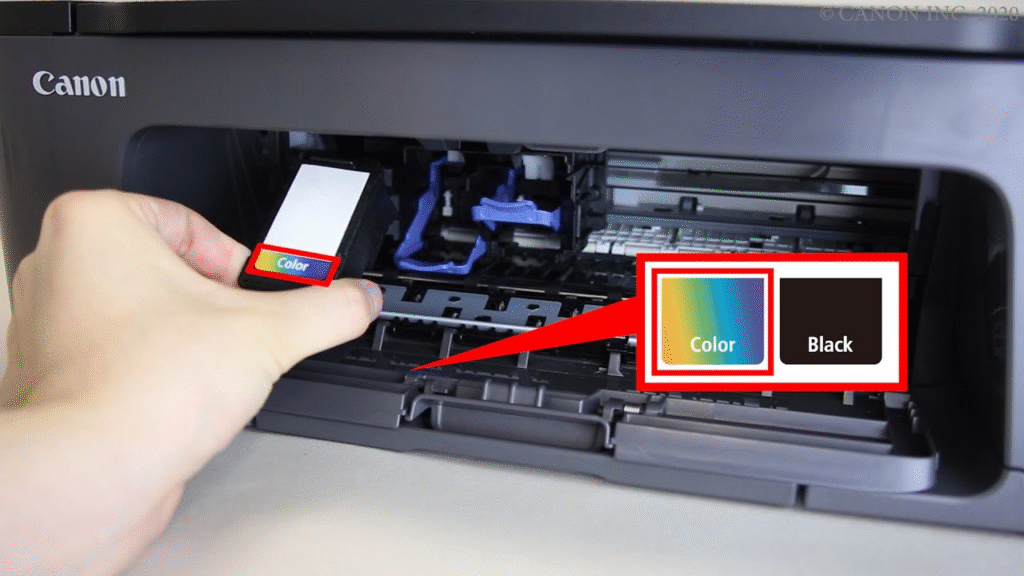
Step 3: Remove the Old Cartridges
Lift the lid or lever of the ink cartridge holder to unlock the cartridges. Carefully grasp the old cartridge by the sides and pull it out. Avoid touching the electrical contacts or nozzles.
Step 4: Prepare the New Cartridges
Take the new ink cartridges out of their packaging. Remove any protective tape or covers without touching the nozzles or contacts. Gently shake the cartridges to distribute the ink evenly.
Step 5: Install the New Cartridges
Insert each new cartridge into its corresponding slot. Press down until it clicks into place, confirming proper installation.
Step 6: Close the Printer Cover
Close the printer cover or access panel securely to prevent errors during printing.
Step 7: Check for Alignment
Some Canon printers will prompt you to align the new cartridges. Follow the on-screen instructions or use the printer menu to complete the alignment process.
Step 8: Test Print
Print a test page to ensure the cartridges are functioning correctly and that the print quality is satisfactory.
Leave a Reply