Printing Photos from Your iPhone: A Simple Guide
In the digital age, smartphones have become our go-to devices for capturing precious moments through photos. Sometimes, there’s nothing quite like holding a physical print of your favorite memories. Here’s a step-by-step guide to printing photos from your iPhone.
Step 1: Select Your Photo
Open the Photos app on your iPhone and choose the photo you want to print. Browse through your albums or use the search feature to locate the specific image.
Step 2: Edit if Desired
Before printing, you may want to enhance your photo by adjusting brightness, contrast, or color. Use the built-in editing tools in the Photos app or opt for third-party apps for advanced editing.
Step 3: Share the Photo
Tap the Share button (a square with an upward arrow) to open the sharing menu.
Step 4: Choose Printing Options
Select the Print option from the menu. If it’s not visible, swipe left on the bottom row of icons and tap More to add the Print option.
Step 5: Select Printer
Your iPhone will detect nearby AirPrint-enabled printers. Choose your printer. If you don’t have an AirPrint printer, use a third-party printing app or connect via Wi-Fi to a compatible printer.
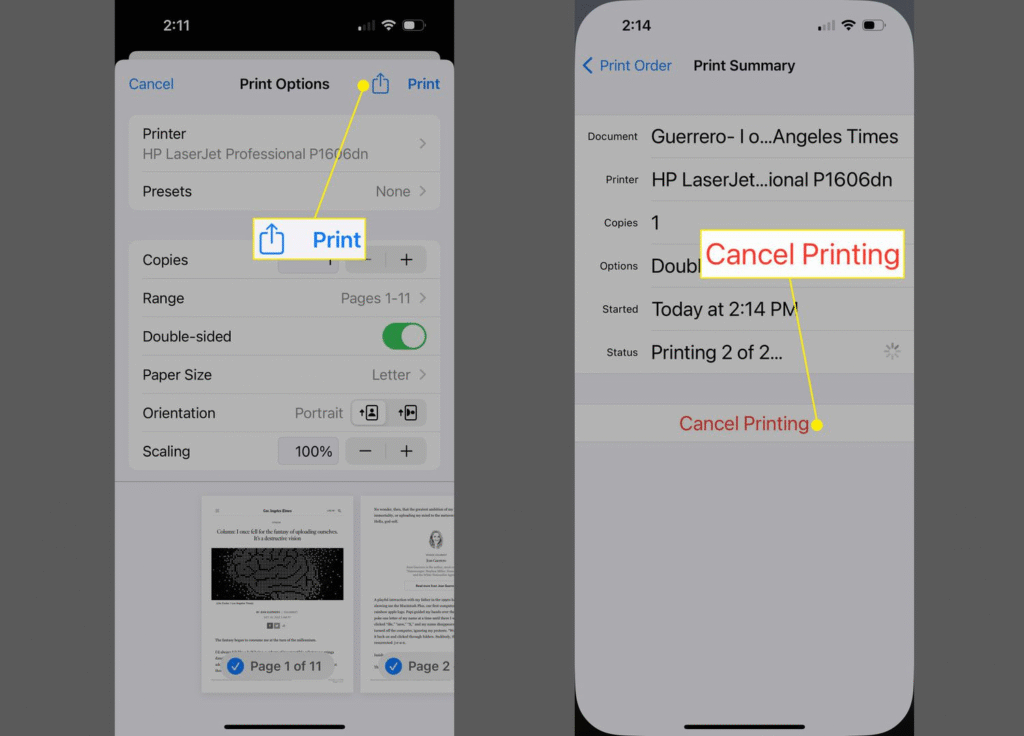
Step 6: Customize Print Settings
Adjust print settings like the number of copies, paper size, and color options. Once ready, tap Print to send the photo to the printer.
Step 7: Collect Your Print
After the print job is sent, collect your physical photo from the printer tray and enjoy your tangible keepsake.
Conclusion
Printing photos from your iPhone is simple and allows you to turn digital memories into physical mementos. Whether creating albums, decorating your space, or sharing prints with loved ones, this process makes preserving memories easy and enjoyable.
Leave a Reply