In today’s environmentally conscious world, reducing paper usage is a priority for many. One simple way to achieve this is by printing documents double-sided. For Mac users who might not be familiar with the process, it can seem daunting. Printing double-sided on a Mac is actually straightforward once you know how. This guide walks you through the process step by step.
Step 1: Prepare Your Document
Before printing double-sided, ensure your document is formatted correctly. Check margins, spacing, and alignment to avoid any issues when printing on both sides of the paper.
Step 2: Open the Print Dialog
Once your document is ready, go to the File menu and select Print, or use the keyboard shortcut Command + P to open the print dialog.
Step 3: Access Printer Settings
In the print dialog, locate the Printer dropdown menu and select your printer. Click the Show Details button to reveal additional print settings.
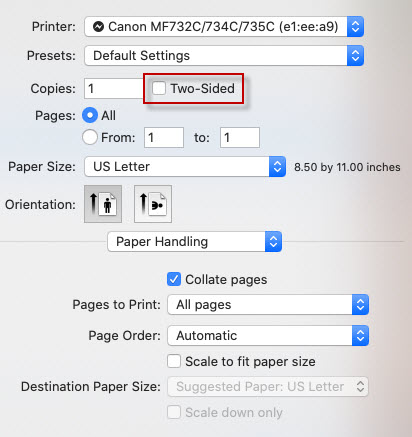
Step 4: Enable Two-Sided Printing
Look for the Two-Sided or Duplex Printing option. Depending on your printer model and macOS version, this may appear under a tab or dropdown menu. Select Long-Edge Binding or Flip on Long Edge to ensure correct page alignment.
Step 5: Print Your Document
With two-sided printing enabled, verify other settings such as paper size, orientation, and quality. Click Print to start the printing process.
Conclusion
Printing double-sided on a Mac is a simple yet effective way to reduce paper usage and minimize your environmental footprint. By following these steps, you can easily configure your printer to print on both sides of the paper without hassle. Incorporating double-sided printing into your routine is a small but meaningful step toward sustainability.
Leave a Reply